Part 1. Pre Production
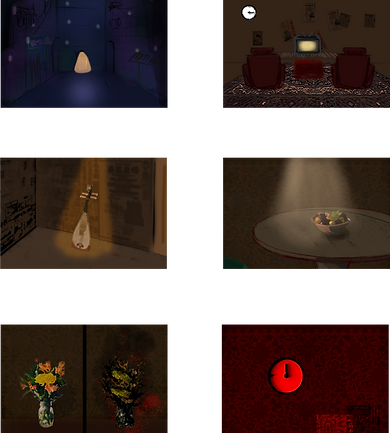
An interactive and immersive story about love, hate, and home. Players will find clues in a VR environment and figure out the truth: who is the owner? What happened to her/him? Is it still safe to stay there? Are you just a visitor, or someone in the story?


Part 2. Process
I spent a long time doing this project this semester. Unlike other courses, the was team assigned by the teacher referring to a skill chart. So in the first meeting, we spent a lot of time communicating ideas. The original idea was to visit different objects in a darker room, and then let the objects make sounds to guide the viewer to turn, and then tell the complete story. At that time, we had no specific ideas about the furnishings, styles and specific models to be put in the room. In the second week of discussion, we agreed to make a horror story that takes place in an old Hong Kong-style room. From the first-person perspective, the viewer listens to different fragments of memory to restore the story that happened in the room. We used Unity Collab to build the room model together. In the beginning, we found a lot of models from the asset store, but this made the models we scanned not obvious enough.

Old Hongkong styled building and texture
Later, we found that the scanning function of the iPhone12 can quickly complete taking pictures and building models, much faster than the Metashape. Matt and Rainee scanned the sofa on the eighth floor and the tables and chairs in the lounge on the second floor, which are surprisingly compatible with our room. We also have photos from a Hong Kong restaurant and made them as wall textures.
According to Matt’s script, we recorded some audio. I built timelines on important models and added audio to objects based on the story. At the same time, in order to create a horrible atmosphere, I did some work on the lighting. During the time period when the object makes a sound, I set a flashing point light. When the sound stops, the lamp will also turn off.

In unity, I installed the oculus package for the project, hoping to export the project to an Android installation package. I encountered many problems during this period. Although the settings in unity have been completed, ER’s Quest 2 did not have a developer mode account, which causes the computer and glasses to fail to connect. I registered another account myself, but the activation of the developer account must be done in a network connected to VPN, and complicated operations such as binding a credit card are required. Finally, the professor helped me to sign in with his ID and the Android package finally worked. Since the Quest 2 cannot support high-poly models, I deleted some of the asset models and lights. I took a screen record in Quest 2Another problem then came: for the IMA show we may not use the Oculus Quest 2 for the final production, and we should have a 360 video upload on YouTube. So, I have to rethink the camera work. I discussed with other group members and we decided to change the camera to a keyboard player controller, through which one can move freely inside the room.

(some scripts)
During the test process, Dave and I also discovered an interesting bug. I added a collider to the wall of the room and added the attribute of Rigidbody3D to him. But the character will still run out of the wall when moving. After trying several times, I found that after clicking play mode, the collider of the wall dropped due to the attribute of the rigid body, but the wall model did not drop. After the Rigidbody3D is removed, the character can move normally, but the separation of the collider and the model is still very fun.
To make our story more complete, I added textures and lights in the first scene.
After showed to the class one week before the final, I realized that we would better have the game view recorded and do some editing rather than let the viewer run with no aim. I uploaded the project to cloud drive and my team members recorded video material and complete the final editing. We then spent time adjusting the video resolution and the viewing effect on Oculus Go(it announced supporting 4k video but actually not.)
The final display results were very good. Many students came to see our work, and some tried it more than once. Of course, there are still many small problems in our work. For example, some students reported that they were dizzy when watching them, and some people did not see the end but thought the video was over. We will continue to improve in the future.
Part 3. Reflection
Although I learned Unity through different tutorials on Youtube, I am more responsible for animation and modeling in other projects. In this VR project, I reviewed #C Sharp knowledge, lighting effects, and scene building. I used to think that VR projects are very complicated, but after a week of research, I have a certain understanding of the development system of Oculus Quest, and I can complete the project settings independently. In the process of continuous debugging, I became familiar with the operation of unity and many plug-in functions, such as unity recorder and Unity Collab. I hope to put what I have learned into practice in future projects. Recently, I also reflected on my experience in-group cooperation. Each team member has different expectations for the work, and achieving a common goal and working together requires a lot of communication. I think our group has made a lot of efforts on communication, but there are still many difficulties in producing a VR project in cloud space. I am very grateful to my team members. They have a lot of great ideas and actively participate in the teamwork.


